Thursday, November 19, 2009

Lemon Sabayon-Pine Nut Tart with Honeyed Mascarpone Cream

Sorry for the long delay with this post. I actually made this tart last week, but things have been so crazy with our cute ass foster puppy that I haven't had a chance to write about it!! Good news - my mom is actually adopting him and he will be going home for Thanksgiving! YAY!

I also just had the final exam for my wine class and I'm waiting on the results... don't want to jinx myself but I'm pretty sure I rocked it!

Back to the important stuff - FOOD..... DESSERT.

This was my first attempt at a FL dessert... I chose it because it looked like one of the simpler recipes. I've made both a tart shell and a sabayon before, so it wasn't too intimidating. For anyone that is wondering what "sabayon" is... here is a quickie (hehe I said quickie) definition:

Sabayon (or Zabaglione) is a dessert made with egg yolks, sugar, and some kind of flavoring liquid (such as sweet wine or in this case, fresh lemon juice). The end result is a very light custard, which has been whipped to incorporate a large amount of air.

Got it? Great! Moving on....

The first step in making this dessert was to make the tart shell. This shell was a bit different from others that I've made in that it incorporated pine nuts with the flour and other ingredients. First, my pine nuts went into the food processor:

I pulsed them a few times and then put them into my big KitchenAid mixer bowl, to which I added sugar and flour and mixed briefly with the paddle attachment. Then, I added some butter (at room temp), an egg and vanilla extract...


... and mixed to incorporate into a large dough ball:


This was obviously wayyyy too much dough for one tart, so I divided it into three equal parts, reserving two in the freezer for future use, and putting one in the refrigerator to chill.

Then, I buttered and floured my fluted tart pan (with a removable bottom):


...and gently pressed my chilled tart dough into the pan:

This went into the oven to pre-bake, since my sabayon was not going to actually bake in the oven. While it was turning a perfect golden brown, it was time to make the sabayon.

First, I created a double boiler by bringing a small amount of water to a boil in a pot and placing a mixing bowl with a slightly larger diameter over the top. To this bowl I added the eggs and sugar and whisked:

After the eggs were foamy, I added my freshly squeezed lemon juice, 1/3 at a time, while whisking vigorously to create the custard. The end result looked like this:


... and in the shell:

The final step was to put the tart under the broiler and rotate it to brown the top. After almost giving myself third degree burns, the tart came out looking like this:

While it was cooling to room temperature, I made the mascarpone cream by whipping together a combination of heavy cream, honey and mascarpone. This is served on the side:

A great first dessert (and another really crappy last picture WTF??)... this was relatively easy to put together and I would absolutely make it again. I served it to my boyfriend (who loves everything I make) and my friend Kelly (who is always down to at least try my experiments) and they both came back for seconds!! Yum.

Sources:
Specialty Bakeware - A Cook's Companion, Brooklyn, NY
Grocery and Dairy - Trader Joe's, Brooklyn, NY

Monday, November 9, 2009

Staff Meal Lasagne

Some of you may think that this post is a cop-out because it isn't exactly French Laundry food... however, staff meal is an extremely important part of restaurant culture.... I believe that you can tell a lot about a restaurant by what they feed their staff. At the last restaurant(s) I worked at, we were treated to some pretty great food on a daily basis, and it was easy to see that it was much appreciated by all.

That being said... I thought it was important to make this dish, because I was interested to see the kind of food that Thomas Keller feeds to the (pretty amazing) staff at his acclaimed restaurant. I have made my own version of lasagne tons of times and really don't need any instruction (if I do say so myself :)), but I stuck to the recipe from the book this time around.

First, I chopped up some onions and garlic:


and peeled and diced up a bunch of tomatoes:

Then, I sauteed the onion and garlic in some olive oil until soft and just translucent, and added in the tomato paste, cooking until the mixture turned a vibrant orange color:


Well, my camera skills need some work, but I promise it was orange :)


I added in the tomatoes and cooked the sauce gently for 2 hours on the stove top, stirring frequently to avoid scorching the tomatoes on the bottom of the pot. This was necessary since I used chopped tomatoes only with no juice (as you would have when using canned tomatoes). After it was done cooking, I removed the sauce from the heat, added some chopped oregano, salt and pepper, and put it aside to cool to room temperature. The resulting sauce was thick and somewhat chunky... it looked like this:

While the sauce was cooling, I boiled the lasagne noodles and made the mixture for the filling. The filling consisted of ricotta cheese, eggs, chopped parsley, salt and pepper:

Now it was time to build the lasagne. First sauce:


Noodles:

Ricotta:

And repeat!

To finish, I topped off a final layer of noodles with the remaining sauce and sprinkled it with some seasoned grated mozzarella cheese. Before it went in the oven it looked like this:


After 45 minutes in a toasty oven, the lasagne was bubbling and ready:


One slice on the plate....


Mmmmmm... definitely a good lasagne. The sauce and the filling were flavorful and well-seasoned, and it was light while still filling me up! I have to admit, I did miss the little mini meatballs and definitely the parmigiano cheese, but this is a good, simple lasagne recipe.

Coming up next, something sweet (I promise this time!)...

Comments make my day :)

Sources:
All Grocery and Produce - Met Foods, Brooklyn, NY

Thursday, October 22, 2009

Spotted Skate Wing with Braised Red Cabbage and Mustard Sauce

Another day, another recipe.

Today I made Spotted Skate Wing with Braised Red Cabbage and Mustard Sauce.

What is a skate you ask? Well... it is a strange little fish that honestly doesn't look that appetizing at first glance:
Mmmmmm doesn't that look delicious?

RIGHT.

To be honest, I wasn't a fan of this funny looking creature until semi-recently, but now that I've been converted, I am in love. It is a very forgiving fish to cook and it does not taste even remotely "fishy."

So... getting started.

My first task of the day was to prepare the braised cabbage, because it needed to go into the oven to cook for 3 hours. Nothing is ever easy is it?

First, I trimmed the ribs from my red cabbage and then sliced it into a chiffonade. I put it all in a bowl and added some red wine, tossing to coat:

The mixture went into the fridge to marinate for a few hours. Then, I melted some butter in a saucepan and added the cabbage and the wine, as well as some grated apple and veal stock. The pan went into the oven for two hours and when it came out looked like this:

Then, I added some grated russet potato and wildflower honey and returned the pan to the oven for another 45 minutes. The finished product looked like this:

Creamy and smooth - just needed a touch of salt and pepper.

Next, I started the mustard sauce. First, I chopped up some leeks, mushrooms and carrots:

Then, I sauteed them in some canola oil until they were just browned, and added some veal stock:

This simmered down for about 5 minutes to create a glace (basically a sauce that is the base for another sauce). Then, I added a whole bunch of butter one piece at a time to the glace until I had a thick sauce. The sauce went through a chinois and back into the pot:

You can see in this photo that my sauce was starting to break... so annoying. But I fixed it by adding just a little bit of water and bringing it back to a simmer while whisking! To the butter mixture I added dijon mustard, whole grain mustard, some brunoise and chopped chives. I kept the sauce warm on the stove while I started the final step.

Cooking the fish was relatively easy. I first dusted both pieces with flour and seasoned them with salt. Then, I cooked them in a pan of fully heated canola oil for about 2 minutes on the first side...

And another minute on the second side, while continuing to baste the tops of the skate with the hot oil to add more color.

Time to plate! First the sauce, then the braised cabbage, and finally a piece of skate. Here's the finished product:

The fish was flaky, but not at all dry and had a really nice crisp on the outside. The sauce was, of course, fantastic because it was loaded with butter... :) For anyone skeptical about skate-- once you try this dish, you'll be a skate-lover forever.

If you have read this far, I beg of you to leave me a comment! Pretty pretty please?

Up Next: Something sweet!

Sources-
Specialty Cookware: A Cook's Companion, Brooklyn, NY
Seafood: Fish Tales, Brooklyn, NY
Grocery Items and Produce: MET Foods, Brooklyn, NY

Tuesday, October 13, 2009

Braised Breast of Veal with Yellow Corn Polenta Cakes, Glazed Vegetables & Sweet Garlic

Okay, so I need to start this post with a shout-out to my boy Pedro at Los Paisanos Meat Market in Brooklyn for helping me to procure this veal breast and making my life very easy.

Readers, meet a six pound veal breast, rib bones and all:


This may not seem like a big deal, but it actually took some work to be able to get this cut of meat. The breast on a veal is not very desirable as it is very tough and takes hours of cooking to make it tender.... which is exactly what I planned on doing! :)

The first step in this process was to sear the breast on both sides in a pot large enough to hold not only the meat but also all of the vegetables, braising liquid, etc. I heated up some canola oil until it was hot and then seared the meat until it was nice and golden brown:


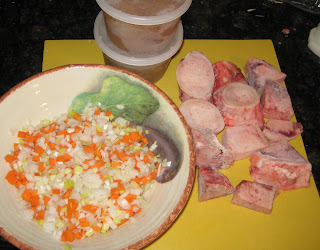
Then, I removed the meat from the pan, drained the excess oil, and sauteed the mirepoix of onions, carrots and a leeks, along with some garlic, thyme and a bay leaf:


Once the vegetables were tender and slightly caramelized, I put the meat back into the pot and added the braising liquid - a mixture of chicken and veal stock. Then, the entire pot went into the oven, its home for at least the next four hours:


hehe.

When the veal was finished cooking it was so tender that I could easily slip all of the rib bones out - it looked like this:


I removed the meat from the cartilage and put it between two pieces of parchment paper and into the fridge. I weighted it with a big 2-gallon jug of water to flatten it out - you'll see why later! I also strained the braising juice and lightly simmered it down to create a concentrated sauce for the veal. I added some shallots and of course some butter (!!) to the sauce and set it aside for the end...

The next step was to make the polenta. I boiled some water, chicken stock and minced garlic in a saucepan, added the polenta, and cooked it for about 20 minutes until it was thick and creamy. Then, I added butter, mascarpone cheese, chives, and salt and pepper to taste. The mixture was then spread in a 9x13 baking dish....

... covered with saran wrap, and put in the fridge to set. As the polenta cools, it goes from being a thick "mush" to a solid mass.

While my polenta was setting, it was time to deal with the vegetables. This recipe called for beets, turnips and carrots to be cut in different ways. The carrots were cut into small batons, the beets were scooped by the tiniest melon-baller ever, and the turnips were scooped with a fluted oblong vegetable scooper. Are you still with me?

Then, each vegetable was blanched separately until they were tender, quickly cooled in an ice bath, and set aside to drain. Once they were drained, they were sauteed in a pan until lightly golden. Then, I added some butter and chives and set the pan aside for later.

The next step was to make the sweet garlic. The whole garlic cloves were blanched not once, not twice, but three times. Then, I added some butter and a pinch of sugar to a pan and sauteed the garlic until golden brown:

Time for the home stretch!! I took the veal and the polenta out of the fridge and cut them with a 2" round cutter into seven equal rounds each. The polenta got a light dusting of flour, and the veal got rubbed lightly with dijon mustard and dredged in panko breadcrumbs. Then, I heated two pans side-by-side and sauteed the polenta in one and the veal in the other until each were golden brown on both sides:


Once they were done, I drained the veal and the polenta on paper towels briefly while began to plate the dish. First up was the sauce that I made earlier... then a piece of polenta, a piece of veal on top of that, and finally the glazed vegetables and sweet garlic. The finished product(s):


!!!!!!!!!!!!!!!

Let's just say that this dish was more than worth the cooking time, ridiculous number of steps, and effort to procure the meat. The veal was crispy on the outside and juicy in the middle and the polenta was to die for (there was even some left over ;) ).....

Next up - something fishy!

Sources:
Meat - Los Paisanos, Brooklyn, NY
Grocery - MET, Brooklyn, NY
Produce - Trader Joes, Brooklyn, NY

Pecorino Toscano with Roasted Sweet Peppers and Arugula Coulis

I totally meant to update on Sunday.... but then after cooking I drank way too much wine to be allowed anywhere near the Internet.

Then I mean to update on Monday.... but got too caught up in the Jets-Dolphins disaster and never got to it.

So here I am, on Tuesday, finally updating this thing!!

On Sunday I took on the task of making not one, but two dishes. This is something that I will never do again.... I must have been out of my mind. After nearly 12 hours of cooking, I was happily rewarded. My first dish was a composed cheese plate of Pecorino Toscano. This cheese is different from a relative that you probably know well, Pecorino Romano. In contrast to the Romano, Pecorino Toscano is quite mild and rather creamy, and never fully reaches the same level of sharpness and saltiness, even with age.

The first step to this dish was to roast a couple of red and yellow peppers in the oven:


After they were finished, they were peeled and julienned...


....and mixed with olive oil, balsamic vinegar, chives and some salt and pepper.

Then, I reduced the heat in the oven and toasted some slices of a fresh baguette with a bit of olive oil until they were golden brown:


While the bread was toasting, I blanched some arugula until it was just tender, squeezed all of the water out and then pureed it in a blender. Then I added some olive oil to the puree to make the coulis:


That picture is kind of cool and abstract looking isn't it? Maybe I'm missing my calling..... maybe not ;)

Then, I sliced the cheese....


... on a a very thin setting on my mandoline and cut the cheese into 35 even squares.

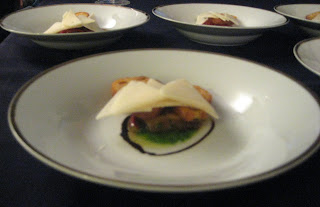
Onto each plate went a thin circle of balsamic glaze (pre-made from an earlier recipe), a spoonful of the arugula coulis, a bit of the roasted red pepper mixture, two homemade croutons and five slices of the Pecorino Toscano. Here is the finished result:


Not bad for my first composed cheese course. It was even worth the effort of roasting and peeling the peppers, which is something that I honestly find tedious and annoying :)

My pictures are looking a little fuzzy for some reason... any of you techies out there have some suggestions??

Up next, Braised Breast of Veal with Yellow Corn Polenta Cakes, Glazed Vegetables & Sweet Garlic!!

Sources:
Cheese - Stinky, Brooklyn, NY
Produce - Trader Joe's, Brooklyn, NY

Saturday, October 10, 2009

Venison Chop with Pan-Roasted Butternut Squash and Braised Shallots

I'm baaaaack. Sorry for the week-long hiatus, but I've got some good ones for you coming up in the next couple of days.

Last night, I made venison for the very first time!!! I've never been a huge fan of game meat, but I thought I would give this one a try.

The first step in this process was to make the "quick" sauce for the venison... "Quick"... RIGHT. Nothing about this sauce was quick, but it was worth it in the end. This was my mise en place for the sauce:


Oh! And blueberries (they didn't fit nicely in the first picture :)):


First, I browned my venison bones over high heat until they looked like this:


Then came the painstaking process of deglazing the pan. First with water, then with chicken stock:


Then i added in my mirepoix of onions, leeks and carrots and cooked it until the vegetables were slightly caramelized. Then I added the blueberries...


...and deglazed the pan again before adding the rest of my stock and transferring the whole mixture to a smaller pot.

45 minutes and lots of skimming later, it was time to strain my sauce in a china cap:


I then took the remaining liquid and cooked it down until I had about a cup of reduced sauce. The bad news: I forgot to take a picture of it :( .... The good news: you can see the sauce on the plate at the end of the post! :)

Now that I was done with my quick sauce (yup, uh huh, right), it was time to prepare the rest of the dish!

First I roasted some shallots in the oven with thyme in a little tinfoil packet:


When they were done, I removed and discarded their skins as well as the thyme sprigs and chopped the shallots into smaller chunks.

Then, I took a butternut squash and sliced rings about 1/2" thick on my mandoline. Using a 2" cutter, I cut the pieces of squash into 6 perfectly round slices:


The slices went into a hot bath of chicken stock until tender, and then were drained on paper towels until I was ready to use them.

Meanwhile, I crisped up some bacon in a pan:

Time to put everything together! I heated oil in a saute pan until it was hot and then added my beautiful venison chops:


While the chops were cooking, I fried up the butternut squash rounds in some oil:


....And sauteed the shallots from earlier with brunoise, tomato diamonds and a little bit of beurre monte (HEAVEN).

Once the chops were done it was time to plate. First the sauce (yay you can finally see the sauce), then two slices of the squash, followed by the chop, the shallots and finally the crispy bacon. The finished product:

Well. It was definitely venison! But some of the best venison I've ever tasted, if I do say so myself ;) ... Can't say that I'll make this dish very often, but it was definitely worth a try.

Coming up tomorrow -- Braised Breast of Veal with Yellow Corn Polenta Cakes, Glazed Vegetables & Sweet Garlic..... AND .... Pecorino Toscano with Roasted Sweet Peppers & Arugula Coulis.

Comments make the world go round!

Sources:
Venison: Los Paisanos Butcher, Brooklyn, NY (best. butcher. ever.)
Grocery Items: Trader Joe's Brooklyn, NY